
How To Install Ceiling Tiles In Bathroom
Install ceiling tiles if you want a quick, easy-to-implement makeover that will transform the look of your bathroom. Decorative tiles, especially when combined with a unique molding, can add a subtle refresh to the room’s décor and feel. Depending on the make and model of tiles installed, they may also serve a practical function, such as insulating the ceiling and dampening noise. To undertake this remodel project, you’ll need basic skills using common household tools are required.
For bathrooms with ceilings in excellent condition, you can install the tiles right on top of the existing ceiling. If your bathroom ceiling exhibits wear, tear, or dilapidation, you can install furring strips to enhance the tiles’ foundation.
Either way, you’ll be astonished at how new ceiling tiles can improve the feel and look of your bathroom.

#1. Clean The Bathroom Ceiling thoroughly
If the ceiling isn’t too dirty or oily, use an all-purpose cleaner and a scrubbing sponge to clean the ceiling in small sections. Before installing your tiles, ensure the ceiling is bone dry.
Your tiles will attach better if the surface is clean. If your bathroom ceiling is dirty and covered in dust or grime or has peeling paint, it may not be easy to attach the tiles to the ceiling. If your ceiling is extremely greasy, use a DIY cleaning solution of half a gallon of water and one cup of ammonia to clean the grease.
#2. Measure The Size Of the Ceiling (In Square Footage)
Using a measuring tape, determine the length of the ceiling. Then determine the width of the ceiling. To calculate your square footage, multiply these two figures together. If your bathroom ceiling is 12 feet long and 15 feet wide, for example, your square footage is 180.
#3. Determine The Number Of Tiles You Need
You must calculate the size of each tile in square footage. To get the tile’s size, multiply the length by the width. Divide the ceiling’s square footage by one tile’s square footage. These calculations will determine the number of tiles required.
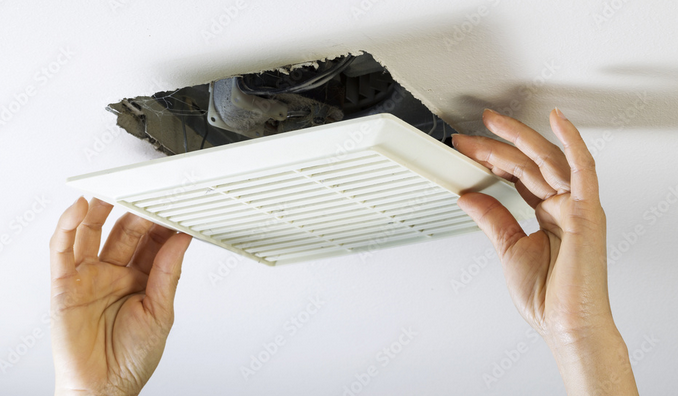
#4. Remove Any Vents And/Or Fixtures
Remove any fans, light fixtures, and/or air vent covers that are attached to the ceiling. This will make measuring and installing tiles easier without damaging the fittings and fixtures.
Generally, you’ll need simple tools such as a Phillips or flat-head screwdriver to remove fixtures. This is also an excellent opportunity to clean the fixtures and vents.
Installing Tiles Directly on the Ceiling
#1. Find The Center Of The Room And Mark Use Chalk Lines
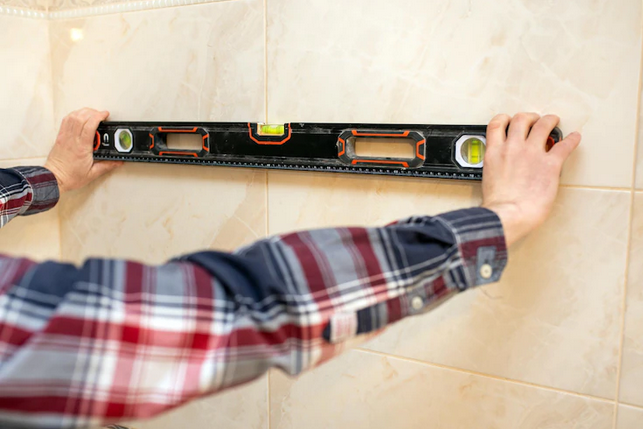
Using the length and width you took of the ceiling, measure halfway across each wall in opposite directions. Attach the reel or chalk line on the room’s half mark or have someone hold it in place. Align the other end of the chalk line to the opposite half marker. The chalk line should be snapped against the ceiling to mark. Rotate 90 degrees and mark the half line on the two opposite walls.
#2. Apply Adhesive Or Cement To Your Ceiling Tiles
Spread glue on the back of every tile using a putty knife or foam brush, or a putty knife. Apply glue to the middle of every tile and on the four corners about an inch (or 2.54 cm) from the edges.
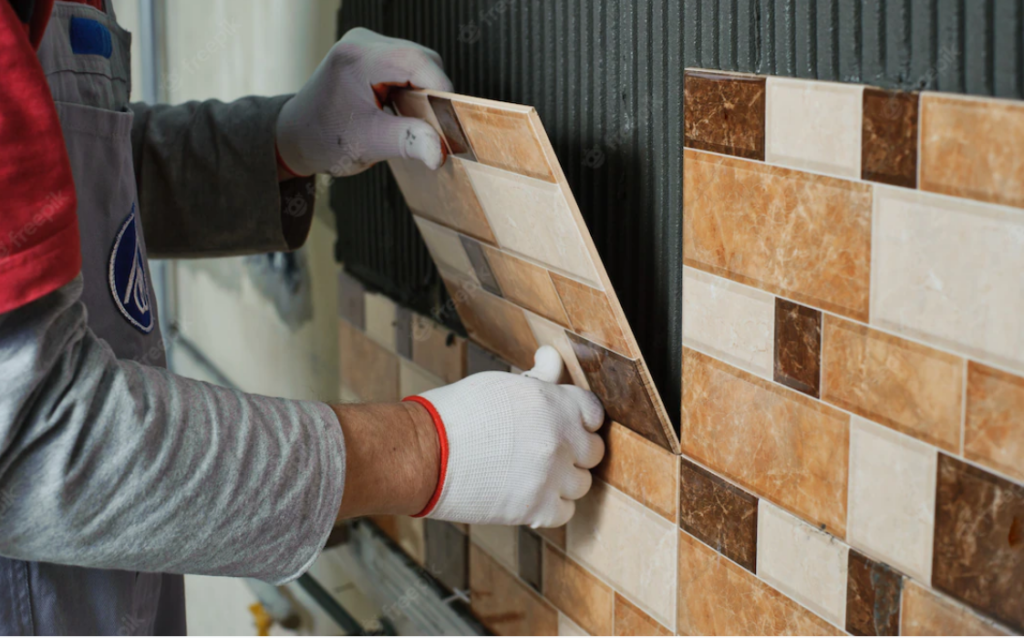
#3. Apply Whole Tiles To Your Ceiling
Place your first tile where the two chalk lines intersect at the center of the ceiling. Make sure it’s aligned properly and level before making sure it’s adequately attached by pressing the tile solidly against the ceiling. Working outwards from the center, continue to lay tiles outwards until you reach the other end of the ceiling. Use the chalk lines you laid earlier as your guide.
#4. Cut Tiles To Fit The Fixtures
In areas where you have fixture holes, you need to transfer the shape and size of the fixture on your tiles. Measure the fixture hole and draw the shape of the fixture hole on the tile you intend to install around the fixture hole. Using scissors or straightedge, design and cut the hole according to the measurements and drawings. Apply glue to the tile and position it above the fixture hole on the ceiling.
#5. Measure The Spaces Around The Edges And Cut The Tiles Into the Right Shapes And Sizes
When you’re almost done installing the tiles, you may realize that you’re getting close to the edges and, in most cases, the tiles will not fit quite perfectly. For the edge tiles, you should measure the exact space left between the installed tiles and the edges. With the measurements in hand, cut the tile with a straight edge, apply glue, and install the edge tiles on the ceiling with a solid press.
#6. Optionally, Attach The Molding To The Ceiling Borders
If you want to add borders to the ceiling’s edges, fasten the molding to the ceiling wall with a staple or nail gun. Thereafter, fill any gaps left behind with wood filler. Finally, paint the molding with matching or complementing color.
How To Install Tile On A Shower Ceiling?
Follow these steps when installing tiles on a shower ceiling, at last, it is the place where we get break from our hectic routines.
Depending on your experience and DIY skill level, you can complete the bathroom tile installation project in a day or two. Below is a list of tools and procedures you’ll use to complete this project. Before you start, we’ll discuss how to remove the old shower tiles (if you have them) and recommend the best sort of tile for a bathroom.
Step #1. Decide Your Tile Layout
Choose between evenly lining up all the grout channels and installing the tiles diagonally (using a technique known as on-point installation). Lining the grout line evenly will necessitate more elaborate preparations.
Here’s a list of the tools, equipment, or supplies you’ll need:
– Grout mixing paddle
– Mixing bucket
– Ceiling tiles
– Grout
– Silicone caulk
– Tile adhesive
– Trowel
– Measuring tape
– Ruler
– Pencil
– Ladder
– Sponge
– Drop cloth
– Tile nipper
– Modified thin-set
– Protective gloves
– Safety glasses
Step #2. Confirm Proper Substrate Surface
Ensure your ceiling has a proper water-proofing substrate surface (thereby avoiding water damage). Additionally, you should ensure that the substrate is correctly fastened into its supporting joists. To learn more about the bathroom ceiling substrate possibilities, go here.
Step #3. Gather Your Equipment
Gather all the supplies, tools, and equipment you need and place them in the bathroom. Next, drape a drop cloth all over the shower floor, ensuring the cloth covers the shower’s edges.
Step #4. Measure Your Bathroom Ceiling
To find a center point, calculate the width and length of the ceiling with your measuring tape. Mark the center spot with a pencil after measuring. Using a ruler, draw perpendicular lines through the center point. These lines will ensure that you install your tiles in a straight line.
Step #5. Cut The Tiles To The Require Sizes
You’ll almost certainly need to cut tiles to fit around the corners of the ceiling. Once you’ve obtained the ceiling measurements and established the number of whole tile pieces you’ll need to cover the ceiling, determine the number of tile pieces you need to cut and in what dimension. Using your tile cutter, cut the ceiling edge pieces into the right size and lay them away.
Step #6. Prepare The Thin-Set
Combine the water and thin-set in your mixing bucket, stirring thoroughly with the paddle. Allow the mixture to thicken, which may take between 5 and 10 minutes. How long you wait will depend on the brand you purchase. Stir the mix every few minutes.
Step #7. Apply The Thin-Set To The Tiles
Apply a thin coat of thin-set on the back of a piece of tile with your trowel, creating uniform ridges. Additionally, mark a bullseye shape on the back surface of the tile using your trowel. The primary purpose of the bull’s-eye pattern is to create suction, which helps the tile stick to the substrate as the thin-set cures.
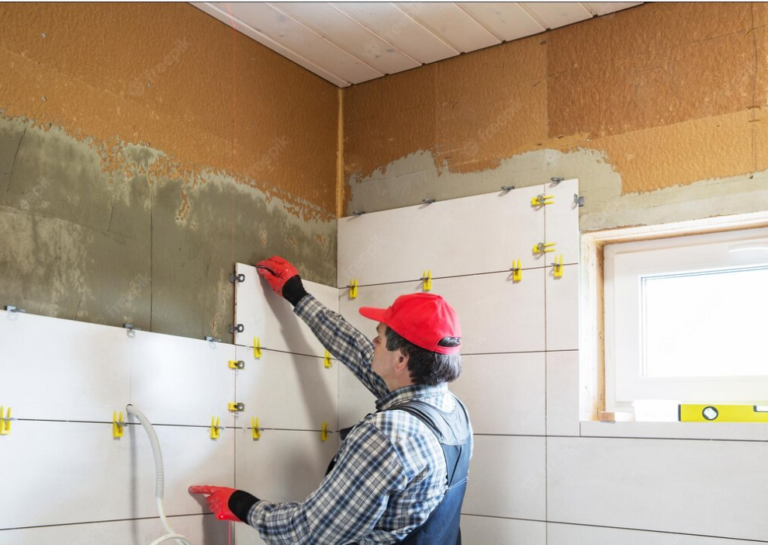
Step #8. Place The Tiles On The Ceiling
After positioning the tile piece on the ceiling, ensure you firmly press it into place. Be sure to position the tile on the perpendicular guidelines that you drew to determine the center point of your ceiling.
If you are doing this correctly, you can hear air being forced out of the thin-set when you push the tile pieces in place. Take two strips of painter’s tape that are between three and five inches long and line both sides of the piece (top/bottom and left/right).
Step #9. Cut Any Additional Tiles As Needed
When you get close to the wall, ensure that the previously cut tile pieces fit between the wall edges and the already-placed tiles. If they are too big, you can re-measure them and then use your tile nipper to cut them down to size. Conversely, If the tiles are smaller than the available space, you will have to cut another piece from larger pieces.
Step #10. Give The Thin-Set Time To Cure
Follow the same installation steps until all tile rows are installed on the ceiling. Give the thin-set 24 hours to cure and set fully. Remove the painter’s tape and plastic spacers from the tiles after the glue has dried.
Step #11. Mix The Tile Grout
Put your water and grout in the mixing bucket. Mix the two ingredients with your paddle until they become a thick paste. Next, use your trowel to apply grout between each row of tiles. Make sure to use a small amount of grout each time so that it doesn’t fall onto your face or clothes as you’re applying.
Step #12. Apply The Grout To The Ceiling Tiles
After applying grout along the grout channels, check to make sure you haven’t missed any channels. Thereafter, wet your sponge with water to clean the places where the grout was applied directly on the tiles. Wait about 45 to 60 minutes to give time for the grout to dry a little. Then the tile faces again, ensuring no spots are covered in grout.
Step #13. Apply The Caulk
Take your silicone caulk and snip the tip of the applicator with shears or a pair of a box cutters. Then, place the caulk tube in a caulking gun and use it to apply caulk to the edges of the tiles. Carefully slide the caulk gun across the channels, pressing it down to apply an even amount of caulk as you move along.
Step #14. Clean Up The Work Area And Allow Your Ceiling Tiles To Dry
Clean your sponge, ensuring all of the grout from previous use has been cleaned from the entire sponge. Wipe any excess caulk on the tile’s face leaving your tile ceiling clean and free of any debris.
Can You Tile Over Old Tiles In Your Shower?
Yes. If the tiles are in good condition and devoid of any cracks (and you’re sure that the backer board or the substrate underneath is still in excellent condition), you can put the new tiles right on top of the old ones. Ensure Make sure that the stems on the water valves on your faucets are long enough to fit your new layer of tiles. For the new tile to stick well to the old tile, the surface of the old tile should be worn down.
Final Thought On Installing Bathroom Ceiling Tiles
Without the ceiling, your home makeover isn’t complete. There’s something special about ceilings that imparts your home with style and elegance.
There’s something special about ceilings that imparts your home the style and elegance you’ve. If you’re looking to install ceiling tiles and save money while doing it, you’ve come to the right place. You’ll learn how to tile your ceiling rather than replace it. With this guide to installing ceiling tiles, we’ve given you the necessary information you need to install ceiling tiles as a DIY project.
In a nutshell, you’ve learned how to install ceiling tiles without any problems.
We can help with glass shower installations, shower remodels, master bathroom remodels, home remodels, and more at Sublime Bathroom Remodel Service. Here’s more about our services and why you should choose us.
Call Sublime Bathroom Remodel, Plant City, FL at (813) 235-4708 if you want to work with a team of professionals who know what they are doing.